Maintenance/Mouse button replacement
Background and problem
I'm your ordinary sort of office worker, one who types and clicks far too often in the course of a day as if this digital thwacking were my only form of exercise. Various body parts connected to these devices are getting old and very much appreciate the mid-range ergonomic keyboard and mouse generously granted by my employer. Office workers of the world, you are advised to ask for at least this much. I think I'm emotionally attached to these toys, perhaps it makes me feel fancy that someone once spent a hundred euro on my well-being. Or maybe it's that one must perform one's longevity as the job becomes a career, like a delivery driver who hangs a pair of fuzzy dice over the rear-view mirror, or an academic whose bookshelf holds all the back issues of a professional journal.
The mouse trouble began when I moved into a "home office"—the mouse lives on a homemade standing desk not much bigger than a cutting board, screwed to the wall at navel height. This is the perfect height for extremely destructive impact of any plastic-encased electronics unlucky enough to fall to the floor, and small enough that this happens often. My mouse has suffered and its once-noble exterior is held together either by gravity or by a small number of the original fasteners. But it still clicks!
At least, it clicks most of the time. Once I noticed the issue, I entered the denial stage of grief and I just clicked harder every time. The charade quickly wore thin. Where this kind of inconsistency really starts to burn is double-clicking, an ableist-enough exercise under normal circumstances but a fool's errand with iffy buttons. For the past year, I thought I had worked around it by software-mapped the right and left buttons to switch them, and I hold the mouse in a funny way which lets me imagine that everything is fine, sort of. It's also causing my habits to cross-wire, and anyway I find that the right button becomes increasingly important in proportion to how much I can't use it.
Maybe I could find another mouse but its manufacturer cleverly built it as a bundle with the keyboard. These and the USB dongle are a happy little nuclear family yet nothing but e-waste if separated. I'd really like to make the mouse work again for the sake of the planet if nothing else. It's a heap of junk to produce and reproduce if really necessary.
Pop the hood[1]
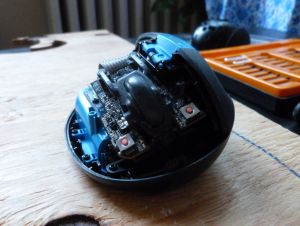
I started the repair by measuring missed clicks with the linux utility xev [2] and it showed that the buttons had become sensitive to the exact orientation of my finger. Either something was wrong with the alignment of the broken plastic parts, contact material was worn off of the internal switch, dust sand and chips had gotten in, or all of the above. First thing to do is just disassemble and reassemble. Next, I cleaned it by wiping out the stray lint, squirting canned air at all the moving parts and flooding the heart of the buttons with isopropyl, finally imagining very hard that I had fixed the issue, yet nothing changed.
Still feeling stubborn, I imagined that the lightest possible repair would involve a quick exchange of the standard microswitches, the little silver squares with an orange dot in the middle which are pressed by plastic stems inside of the buttons. These switches come in exactly the same vanilla flavor that has been made since long before this particular mouse was dreamed up ten years ago. All 8 solder points are accessible as you might see in this image, so it shouldn't be a challenging fix.
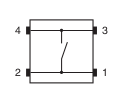
I was able to confirm that the switches have the same pinout and footprint as their potential replacements, although the proof will not be definitively in the pudding until the switches are isolated from their circuit.
A fellow Earth defender in my office's IT department orders the new switches and I barely remember the next couple of weeks of missed clicks.
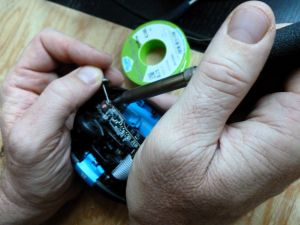
What could possibly go wrong?
The old switches need to be desoldered but the geometry of a four-legged chip is slightly annoying. I believe that the right tool to lift both legs on one side or all four legs at once with be either a double-headed iron, or a hot air setup. Desoldering the legs one at a time is hard to do otherwise since the legs go under the component and there's not much to pry at. I relied on the versatile thumbtack to apply some pressure to the switch body as I heated up each pad in turn.
In hindsight, what I relearned is that coffee mixes poorly with fine motor tasks. My hands were trembling like leaves in wind, and I probably used ten times the force that I should have when pushing the thumbtack under the switch. I also should have pried only at the legs and not at the body of the switch itself, if possible.
What I'm trying to get around to telling, gentle reader, is that I tore a bunch of important little electrical traces right off of the board during this step.
Here are some photos of the damage:

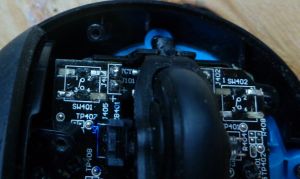
It's a bit like discovering that bits of a placenta are missing after birth: this is going to be a serious problem and we shouldn't continue without knowing exactly what went wrong.
Nonetheless, I thought I would try to finish the replacement as planned.
After all, the internal wiring for these switches has the left and right pads tied together internally so it's possible that we only need one pad conducting the signal and the other would have no traces, purely for mechanical attachment. This could also explain why the exact same pads tore more easily on each switch?
The new switches went in.
I should mention at this point that I'm a complete hack—an unlicensed hobbyist. I was let go from a summer job soldering for a hardware video artist decades ago, and flashbacks from this experience came against my will, singeing my conscience with a cloud of lead smoke even at this distance through time, as I sweat over two small switches.
Okay but it went uneventfully and here is the result, notice the handsome slate-gray nubs.
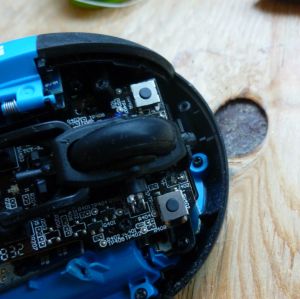
There was a slight height difference between the old and new switches, so I was ready to sand down the part of the button which does the internal pressing.

However, this is where the story turns sad: although the mechanical clickiness feels better than what I remember of original condition, there is no signal sent from either button. They are dead to the computer, and a multimeter confirms nothing is happening on the board. My photographer suddenly gets distracted by the pretty trees outside of our window and mercifully snaps a few photos of that, instead of zooming in on my shed tears as a more seasoned journalist might have done.

Nothing to lose but our chains
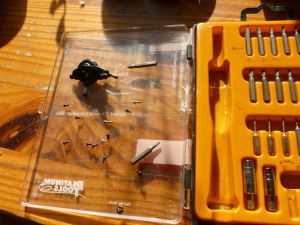
Time to go deep. Take the everything apart and find out what's going on. I'd rather not pull the switches back off, for fear of tearing out the remaining traces. Instead, there's got to be a way of reconnecting the signals that connected to the missing surface-mount pads. A continuity tester confirms that the working buttons do what we might expect: one side has a positive voltage and the other causes a wire in the board connector jumper to toggle between high-impedance and the positive voltage. The broken buttons don't cause a similar signal anywhere on the jumper, and it's hard to tell where the traces should have gone because of the high-obscurity board layout and black solder mask.
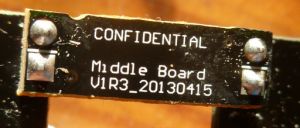
Oh, hold everything! The trivial middle board is clearly marked "confidential", we'll have to stop here and can't go on... Joking.
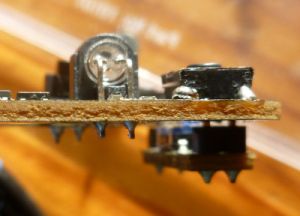
This is only a two-layer board so everything is on the front and back, networks can only go through the board via a via through-hole, sideways on a trace or plane of foil, or through a component. Nonetheless, I can't quite follow the signal. Now we're going to have fun: I make a jumper ending with a small resistor and clip it to the positive voltage of a working switch, poke this into each wire of the board connector one at a time with the mouse turned on, and watch xev.
Luckily for me, this is successful! It becomes clear which of the switch pads should carry positive voltage and which board connector wires relay the outgoing button signals.
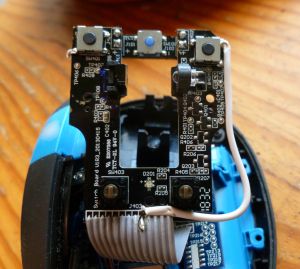
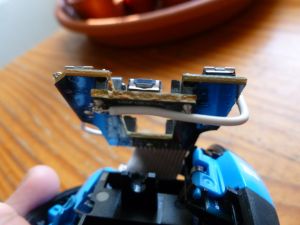
In the end it only takes two additional wires to make the mouse fully functional. I would put this hack firmly on the "I'll jam the satellite uplink with my hair clip" scale of electrical engineering, and the result is a fire hazard which I wouldn't feel comfortable letting anyone else use. But it's good enough for me. The top jumper looks especially scary since it attaches to an unusual hole cut in a ribbon cable, but both wires make me slightly queasy.
Notes
- ↑ I don't own a car nor do I condone their use but did I grow up in California, USA so everything comes with a car metaphor.
- ↑ https://www.x.org/releases/X11R7.7/doc/man/man1/xev.1.xhtml
